Graphics Swapping with IFF Snooper
If you're a Mac Simmer with an object whose function is perfect just the way it is, however, its appearance is all wrong (i.e., it looks really ugly in your sim's house or outright defiles your theme) -- and on top of that, you're artistically and graphically inept, what do you do? Make a new object which looks and functions the way you need it to, of course. All you need is your ugly/un-themed object, another object from your downloads collection which has the appearance you desire (or one you can live with), and IFF Snooper. Thanks to KarinL for originally teaching me how to do this.
Prerequisite Tutorial:
It's highly recommended that you read the SSoW tutorial's IFF Snooper section on how to install the sswPatch to fix a broken object, because the general technique for that (export-dissassemble/move resources/import-reassemble) encompasses most of what you'll be doing here.
The objects I'm going to use for these instructions are the Simlogical Enforceable Chair (the object with the function I'd like to keep) and a downloaded chair I use somewhat often in my theme game (around dining tables and at desks), which has the right appearance.
Since the downloaded chair is the one with the appropriate appearance whose graphics resources I'll be taking, I mark it in my mind (and will refer to it here) as the Donor. Since the Simlogical chair is the one with the appropriate function, and will therefore be receiving graphics resources from the Donor, I mark it in my mind (and will refer to it here) as the Recipient.
Now, let's get started.
1. Disassemble both the Donor and the Recipient, and place the disassemble folders on your desktop beside each other so you can tell which is which by their position. For me, this means Donor on the left, Recipient next to it on the right.
fig. 1
2. Open the Recipient's disassemble folder and "clean it out" by removing all the graphics resources: BMP (if any; not all objects have them), DGRP, PALT and SPR2 by highlighting them (Fig. 2) and dragging them to the Trash.
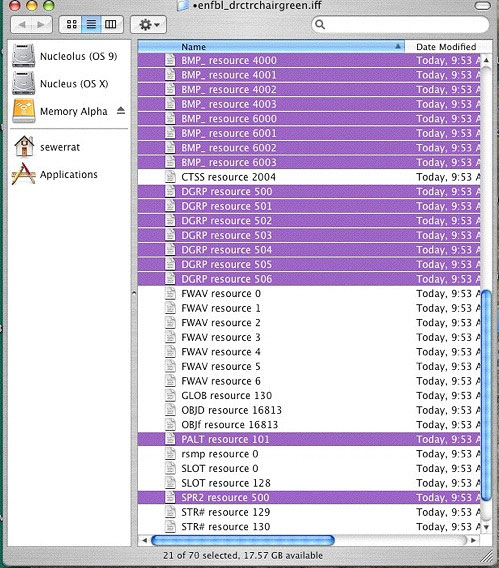
fig. 2
3. Open the Donor's disassemble folder, highlight all graphics resources (again, BMP if any, then DGRP, PALT and SPR2), and drag them into the Recipient's disassemble folder.
4. Double click the Recipient's original .iff file to get back into IFF Snooper, and reassemble the object, using the Recipient's disassemble folder as the source.
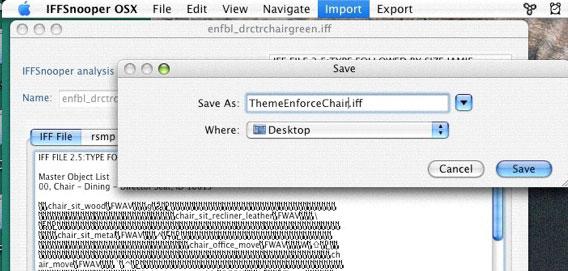
fig. 3
When you get the option to name the new object, choose something new to distinguish it. I'm calling this one ThemeEnforceChair.iff.
5. Open the new object in IFF Snooper and click the DGRP tab, and check the following:
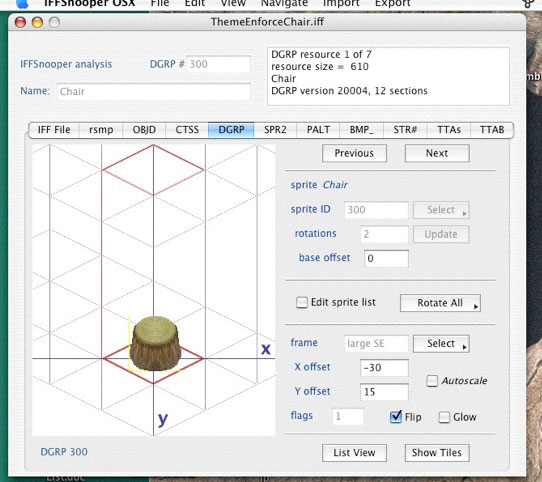
fig. 4
a. Is the picture you see here the same as the original Donor object? If yes, move on. If no, start over with the original Donor and Recipient .iff files. In this case, the answer is yes, so now it's time to "do the math."
b. Look at the top of the DGRP screen and note (on the left) the DGRP #. For this object, the DGRP # is 300. Write it down.
c. Look at the top of the DGRP screen and note (on the right) the box which says "DGRP resource 1 of 7." This means that this object has 7 DGRPs. Note that different objects have different numbers of DGRPs, so if your object says 1 of 1, or 1 of 16, that's fine. Recommended, especially for beginners: Double check this number by opening up the original Donor object and looking in its DGRP screen. But for this example, I write "7 DGRPs" next to the DGRP # 300.
6. In your new object, go to the OBJD tab and click the Edit button on the bottom right to get to the OBJD Edit screen. "Do more math" as follows:
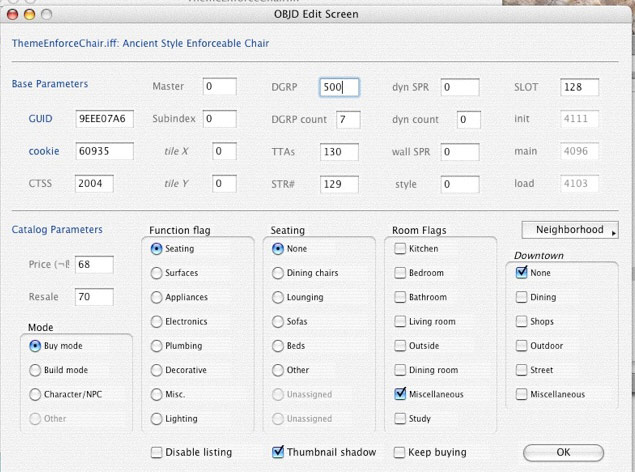
fig. 5
a. Is the DGRP # shown here the same as the one you saw in the DGRP screen? If yes, you're good. If no, you have to change it by typing the correct DGRP # in the box. This one came up as 500, so I have to change it to 300. If you have to change yours, make sure you click the OK button on the bottom right as soon as you do it.
b. Is the DGRP count shown here correct? For this object, it is -- it says 7, and we determined in the DGRP screen that there were 7 DGRPs. However, you do have to check this and occasionally change the number in the DGRP count box so it's the same as the number of DGRPs you found in the DGRP screen. Remember to always click that OK button on the bottom right for every change you make.
c. Look at the number in the CTSS box, then go to the CTSS tab.
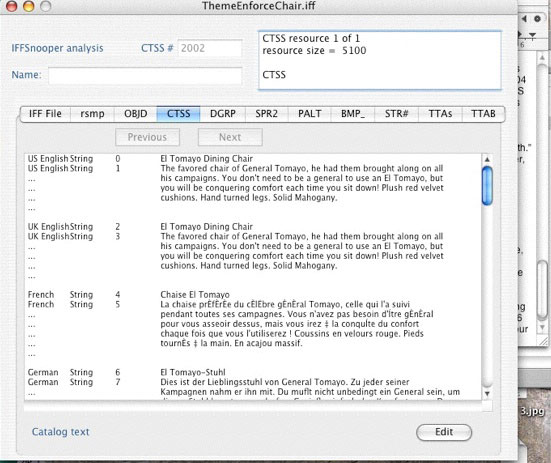
fig. 6
The number in Fig 5's CTSS box is 2004, but the number in the CTSS section itself is 2002. This means I have to go back to the OBJD Edit screen and change the 2004 to 2002. Confession: since I have problems saving my edits in Simlogical's CTSS screens, in addition to taking the Donor's graphics resources, I also brought in its CTSS resource. Please note that despite my "cheat" here, it does sometimes happen that the CTSS numbers don't line up, so it's just as well I included this.
7. Once all your numbers are lined up, save, reopen and double check your "math." If it's OK, you're really done. If not, fix and save/reopen/double check again: lather, rinse, repeat as necessary.
8. TEST your brand new creation!
Personally Customizing Your New Object
While the above steps performed correctly will result in a new object which has both the look and function you desire, it's really fun to "make it your own." For me, this means writing an original description (CTSS editing) and occasionally renaming in the OBJD and/or other screens. If this interests you, continue with the following steps:
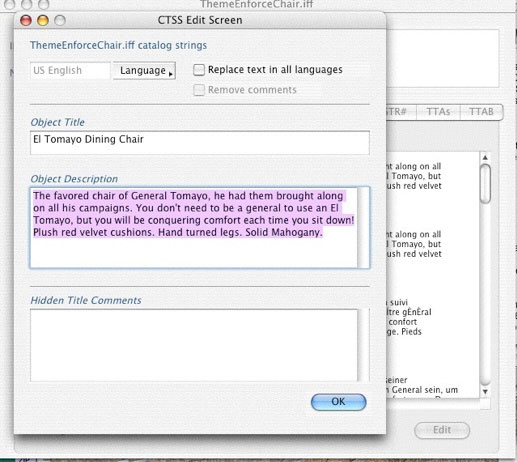
fig. 7
1. Go to the CTSS Screen and click Edit. This brings you to a box with the existing description, which you can highlight, delete and replace with your own text. Fig 6 shows the CTSS Edit screen with original text highlighted. Go on, highlight the text in your object and write up a new description. After you write it, click OK, which will bring you back to the regular CTSS screen, where you can proofread it in full. If you did it right the first time, save -- you're done with this part. If you see typos/misspellings or just want to change the wording, click Edit again and fix it. Always click OK when you finish.
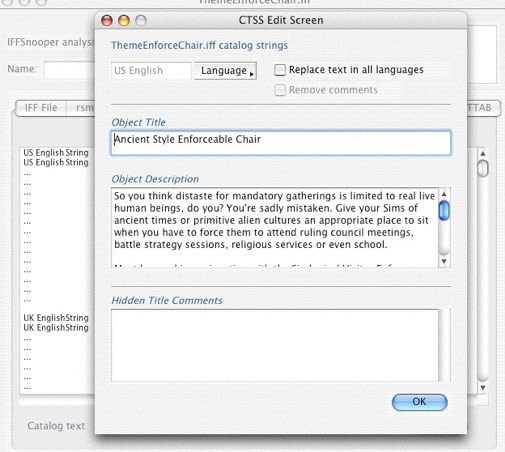
fig. 8
Fig 8 shows my chair's new description in the edit box.
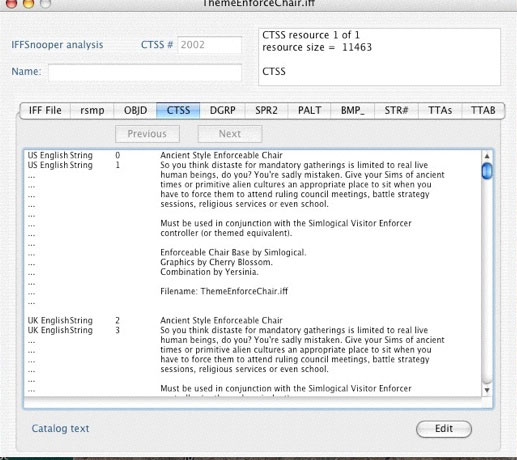
fig. 9
2. Go to the OBJD screen. Note here that the name of the object is still Simlogical's "Chair - Dining - Director Seat." I'm going to change it now. However, every time you open OBJD, the Name box is always greyed out (not editable). To fix this, you can either
a. Click Rename Resource in the Edit menu -- OR -- as you can also see,
b. Command-R
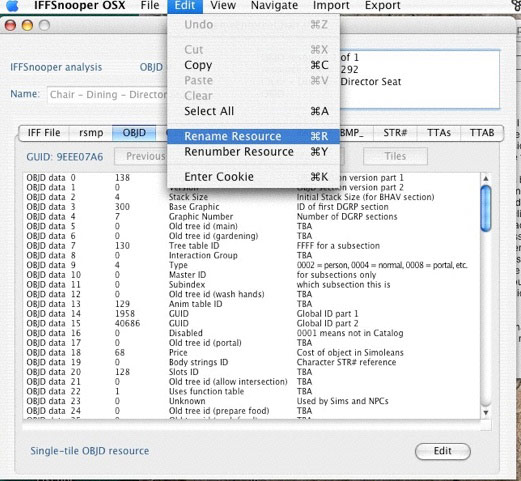
fig. 10
Now type in the name you want. See Fig 11.
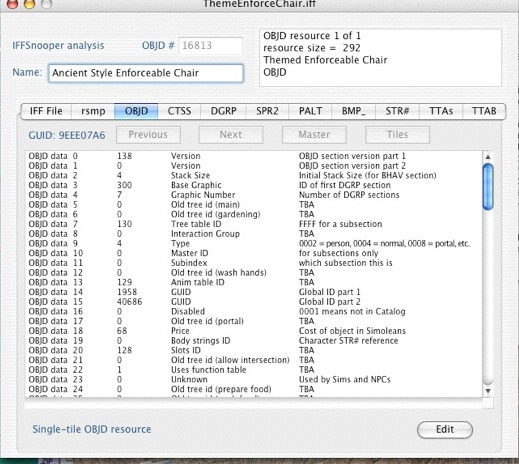
fig. 11
Warning -- IFF Snooper Quirk: If you want to change the name in OBJD like this, not only do you have to do the above, but to make the change stick, after you type the new name, click Edit, then in the OBJD-Edit screen, go to one of the boxes (such as DGRP count or CTSS) and retype one of the numbers (or change a price or something below) -- then click OK.
3. Check the other tabs and rename as desired. The above warning also applies to getting changes to stick in the name boxes of CTSS and TTAB -- you have to click the Edit button, make a temporary "pretend" change, then click OK.
Woo-hoo! The object is all yours now! Enjoy it, and Happy Mac Simming!